We’ve introduced a new stress monitoring feature in Genus to help caretakers proactively support their clients’ wellbeing.
What’s New
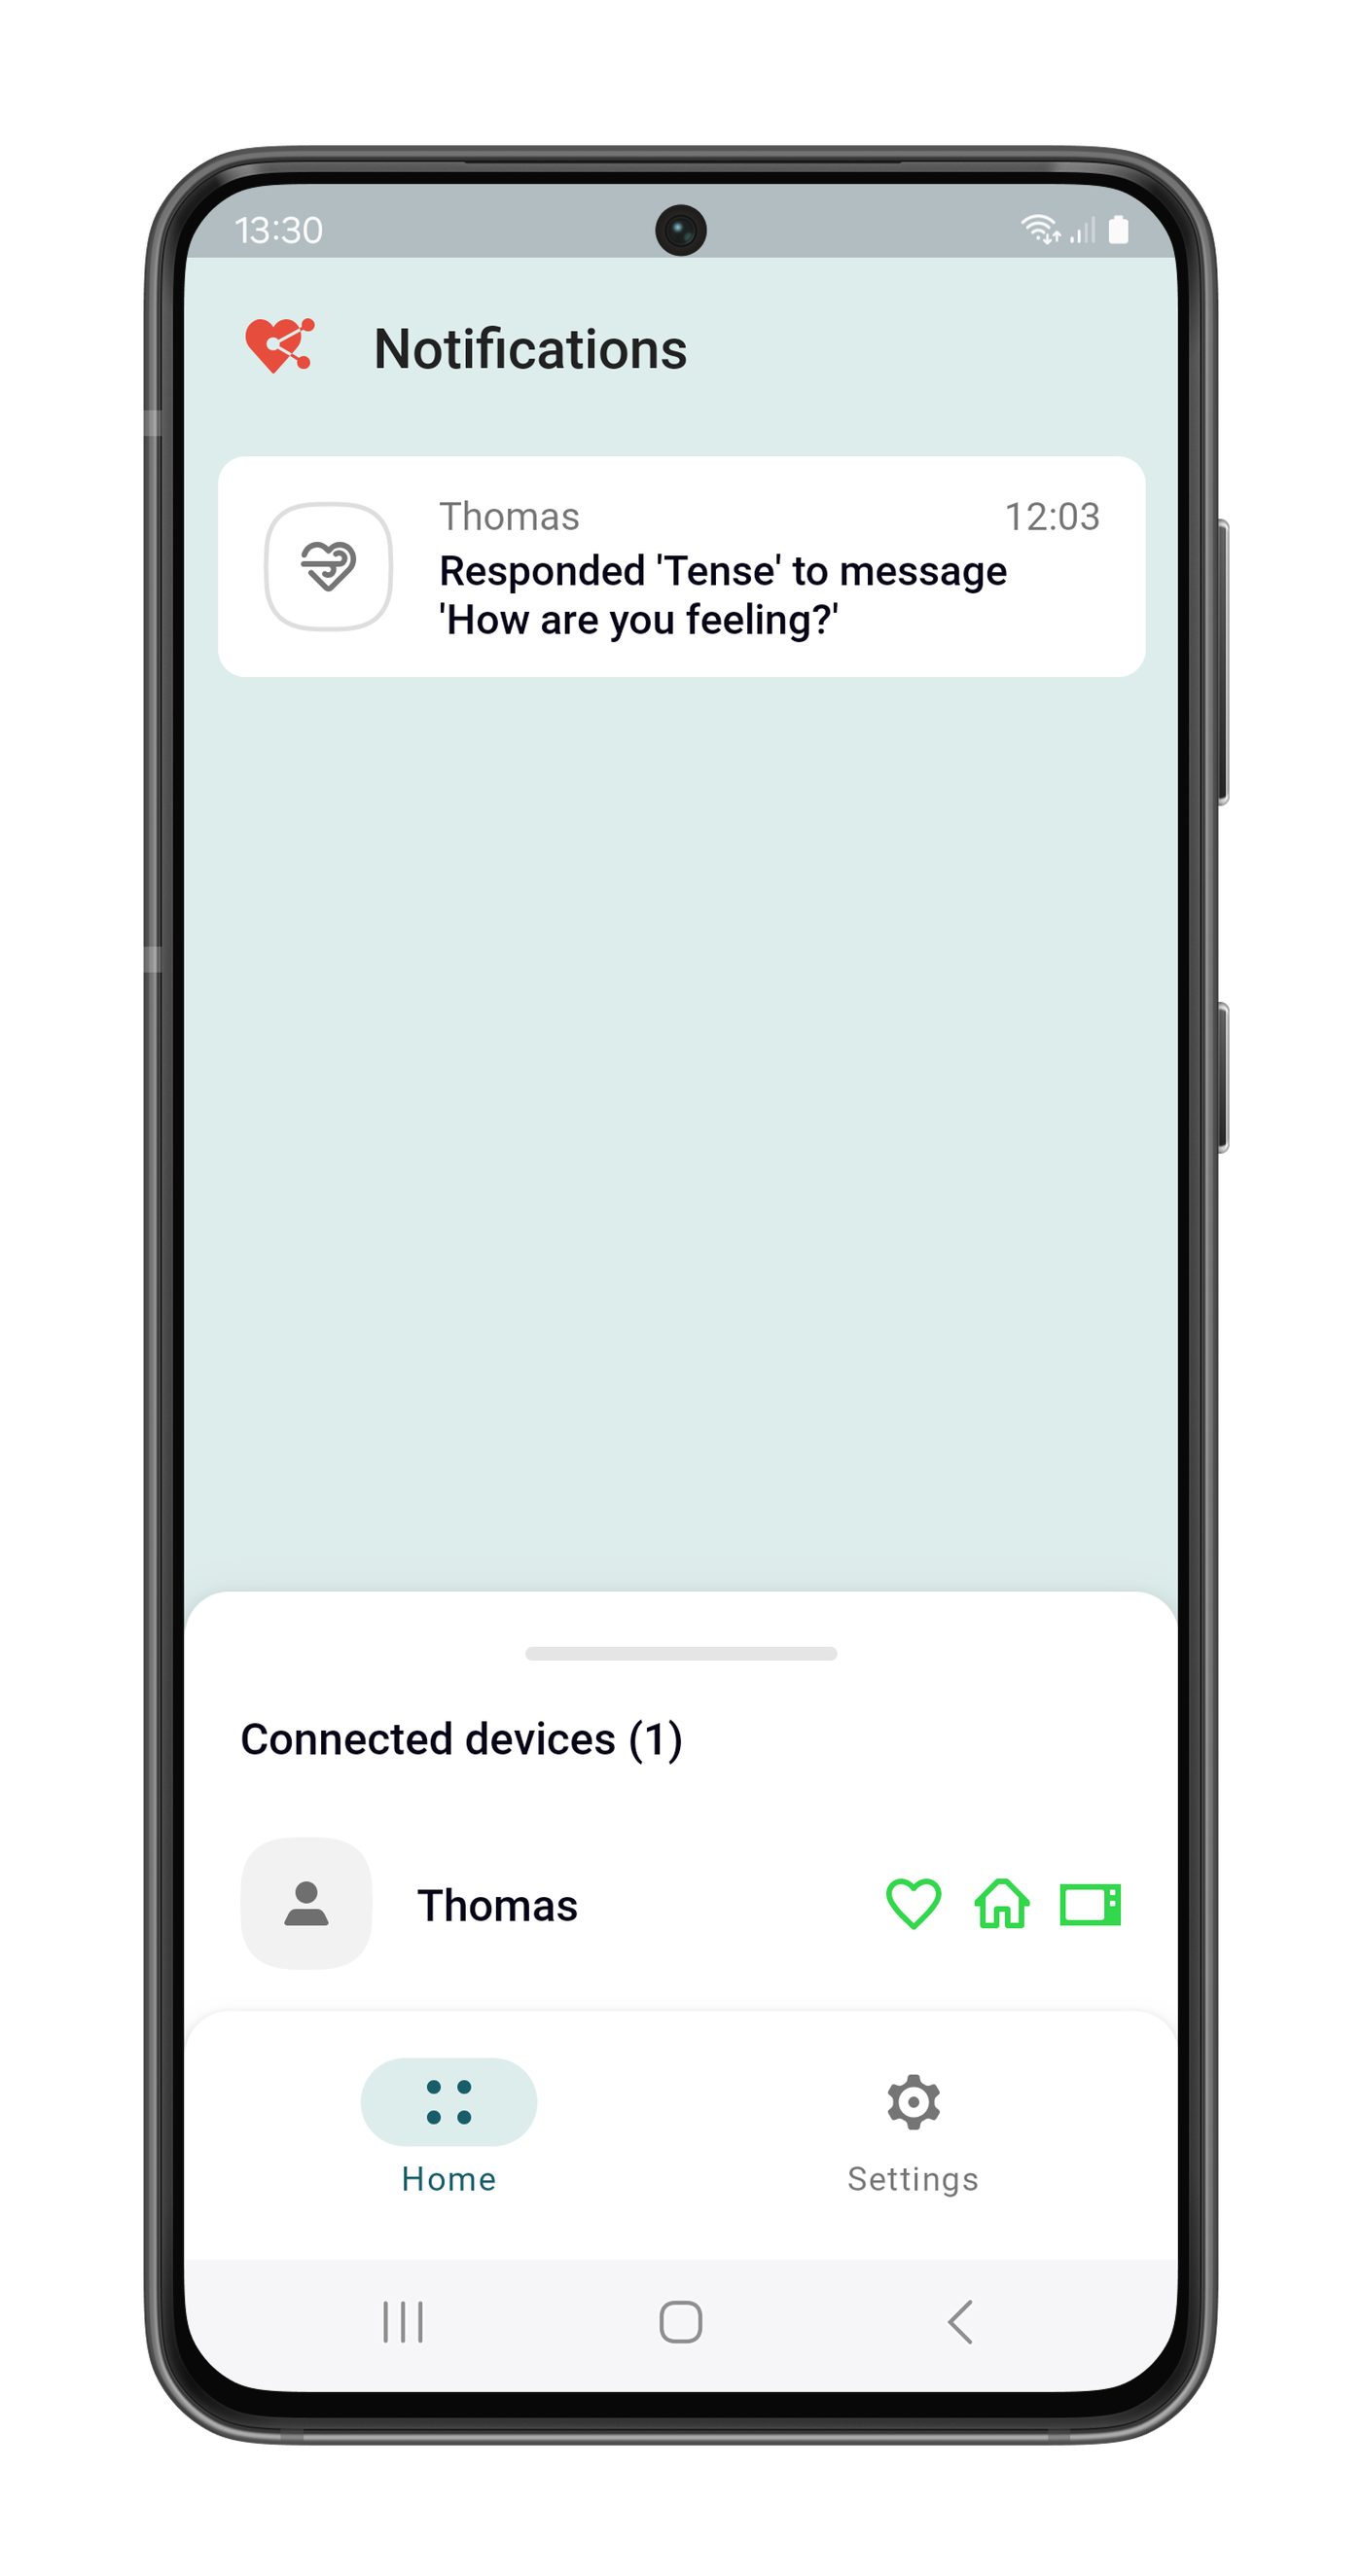
You can now create a “How are you feeling?” question in the Community Portal. This question uses a predefined reply type with four options:
Relaxed
Restless
Tense
Panic
How It Works
When a client responds with anything other thanRelaxed, caretakers automatically receive a notification. This allows them to quickly follow up, either by calling or visiting the client, to ensure they're doing well and to help prevent rising stress levels.
This enhancement enables earlier intervention and contributes to improved client care and safety.
We're proud to introduce a full range of connected sensors - alongside a brand-new Routines engine - designed to enhance safety, comfort, and peace of mind in the home.
With sensors for 𝘮𝘰𝘷𝘦𝘮𝘦𝘯𝘵, 𝘩𝘶𝘮𝘢𝘯 𝘱𝘳𝘦𝘴𝘦𝘯𝘤𝘦, 𝘥𝘰𝘰𝘳 𝘢𝘤𝘵𝘪𝘷𝘪𝘵𝘺, 𝘵𝘦𝘮𝘱𝘦𝘳𝘢𝘵𝘶𝘳𝘦, 𝘭𝘪𝘨𝘩𝘵, 𝘩𝘶𝘮𝘪𝘥𝘪𝘵𝘺, 𝘢𝘯𝘥 𝘮𝘰𝘳𝘦, Genus can now monitor the living environment with exceptional detail. Combined with our intelligent alerting system, caregivers receive real-time insights and updates on any unusual patterns or anomalies.
At the heart of this update is our Routines engine, built in-house to provide simple, powerful tools that help caregivers tailor support to the needs of those they look after.
Connecting a new Zigbee Gateway
To connect our new Zigbee Gateway to your Genus follow the following steps:
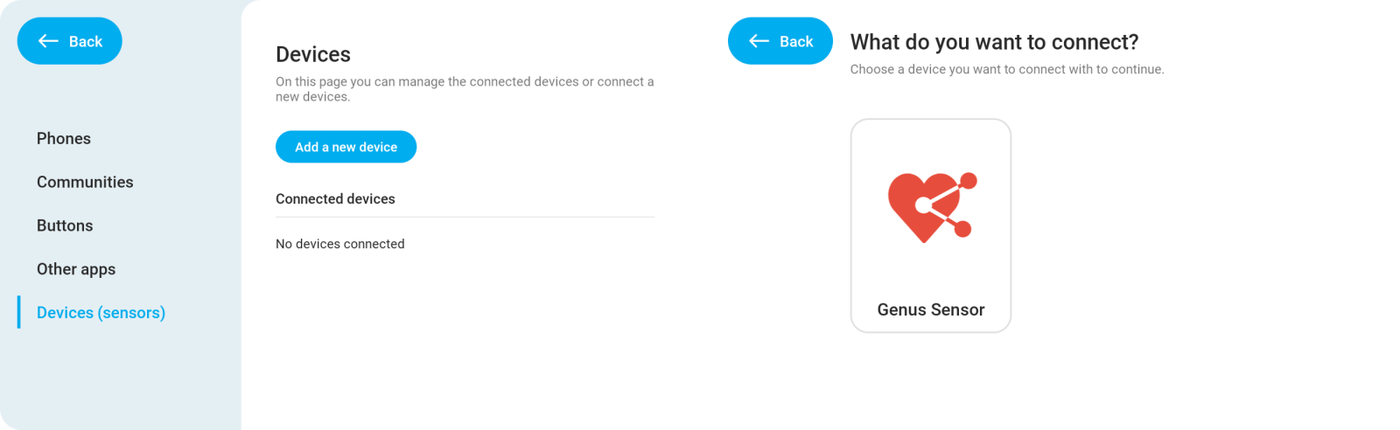
Go to the new Devices page by navigation through "Menu" > "Connect" > "Devices (sensors)".
Tap "Add a new device" to start the set up flow.
The Genus will ask you what to connect. Tap "Genus Sensor".
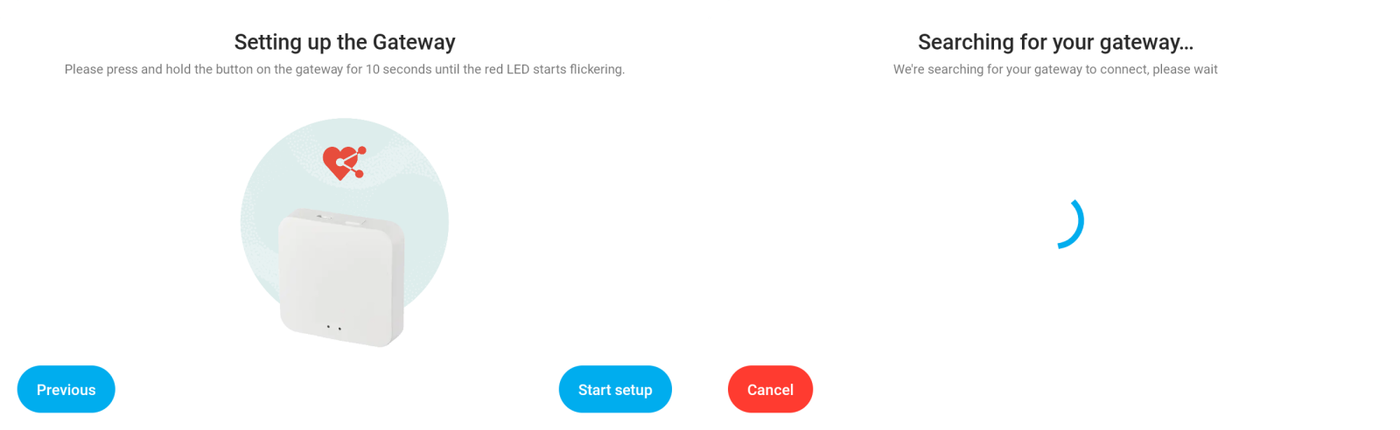
Now connect your Zigbee Gateway to a power plug and press and hold the reset button for 10 seconds. The red LED will start flickering.
Tap "Start setup".
The Genus will now search for your Zigbee Gateway.
When the Genus has discovered the Zigbee Gateway, it'll ask to which network you want to connect the Zigbee Gateway.
Select the network you want to connect the Gateway to. If your wifi has been set up after March 18th it'll automatically fill in the Wi-Fi password. If not you'll have to enter the Wi-Fi password in a follow-up prompt.
Once the Gateway connects to the Wi-Fi, the Genus will show a success message. You can finish the installation here by tapping "Finish" or start adding Genus sensors to your Gateway by tapping "Add device".
Adding a Genus sensor
To add a Genus sensor such as a door sensor, human presence sensor, pir sensor or fall sensor follow the following steps:
Go to the new Devices page by navigation through "Menu" > "Connect" > "Devices (sensors)".
Tap "Add a new device" to start the set up flow.
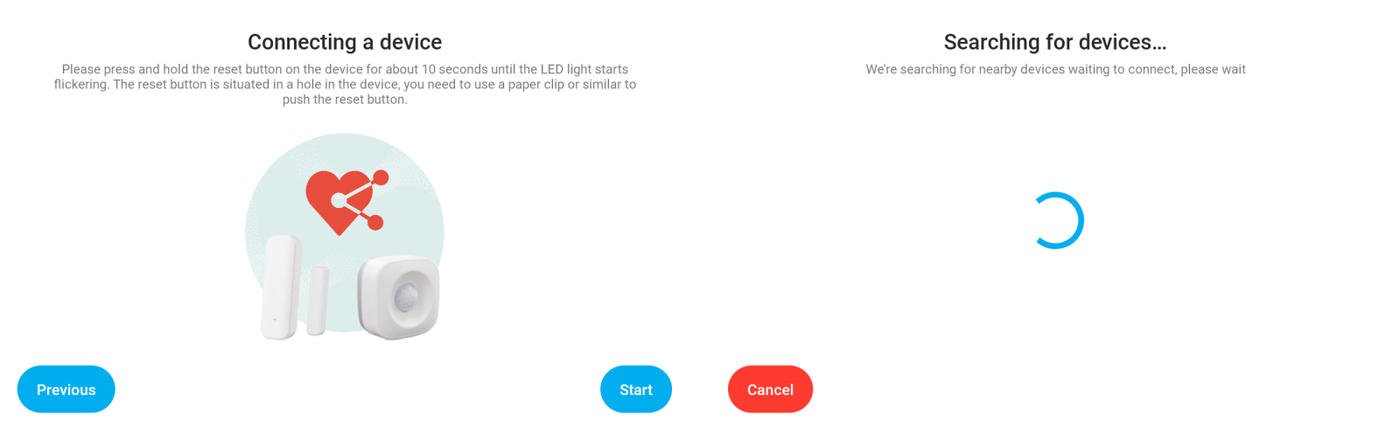
Make sure the plastic lip between the battery and sensor is removed.
Press and hold the reset button on your sensor for 10 seconds. A LED will start flickering.
Now tap "Start" and the Genus will search for your sensor.
Once it's found the Genus will automatically pair the sensor with your Zigbee Gateway.
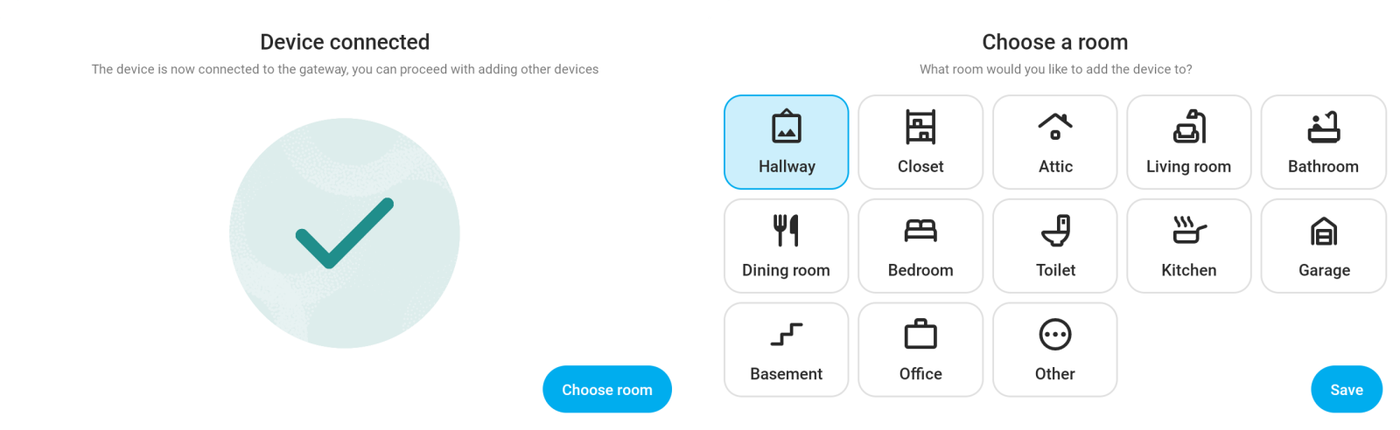
Select a room in which the sensor will be placed and tap "Save".
Testing your sensor or change it's name / room
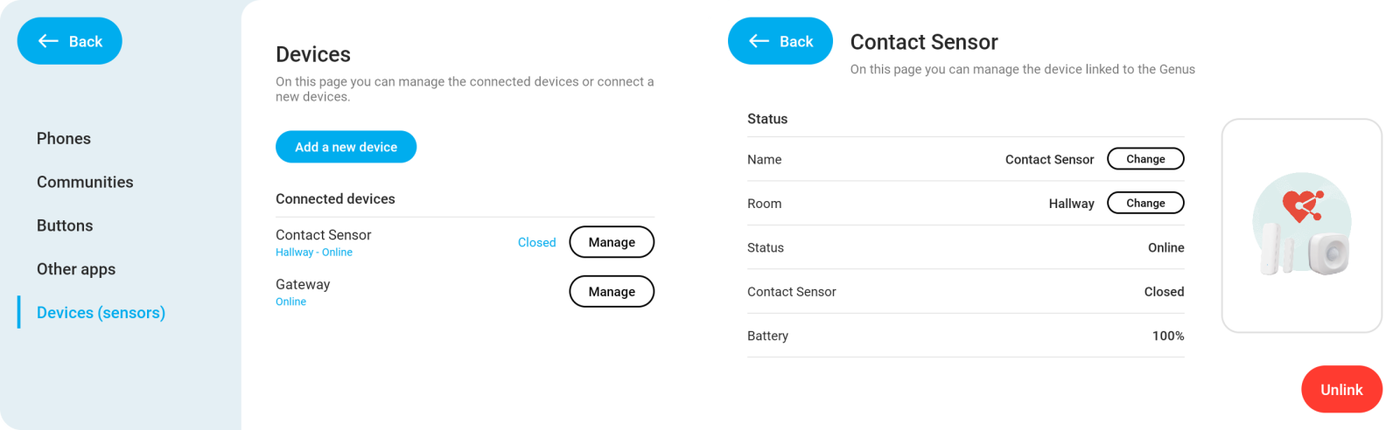
On the devices page you'll see an overview of all your connected sensors along with their current status. This information updates automatically when a sensor triggers something. This way you can easily test all the sensors in your home. For example: Walk to your door, open it and check if the Contact Sensor changes from "Closed" to "Open".
If you want to see more information about your sensor such as the battery level or want to change the room or name, you can tap "Manage" and the Genus will show you a page where you can see this extra info. Here you can also remove the sensor from your Genus.
Setting up a Routine
Now that you've set up the sensors you want to do something with it. Sensors can be added to our Routine engine through the Community Portal.
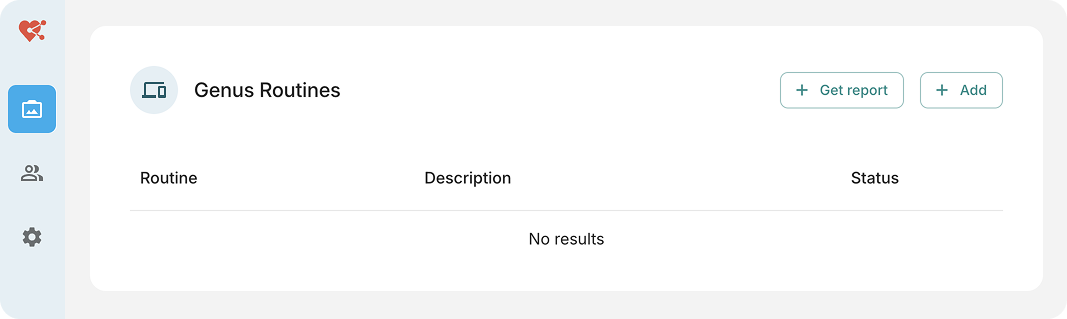
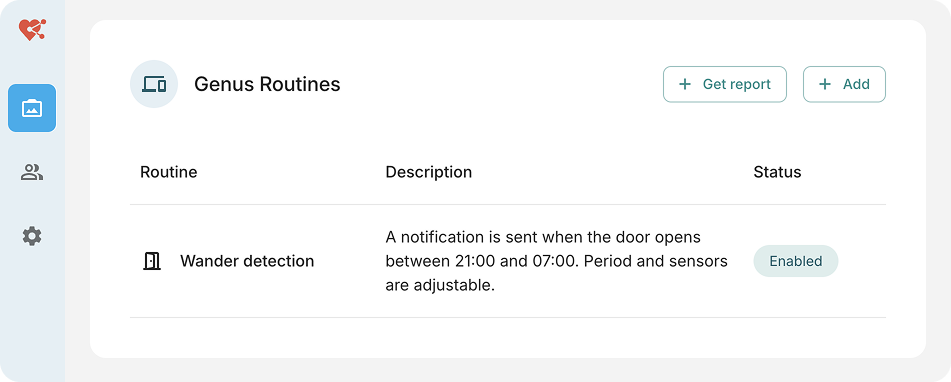
Scroll down till you see the "Genus Routines" card.
Click "Add"
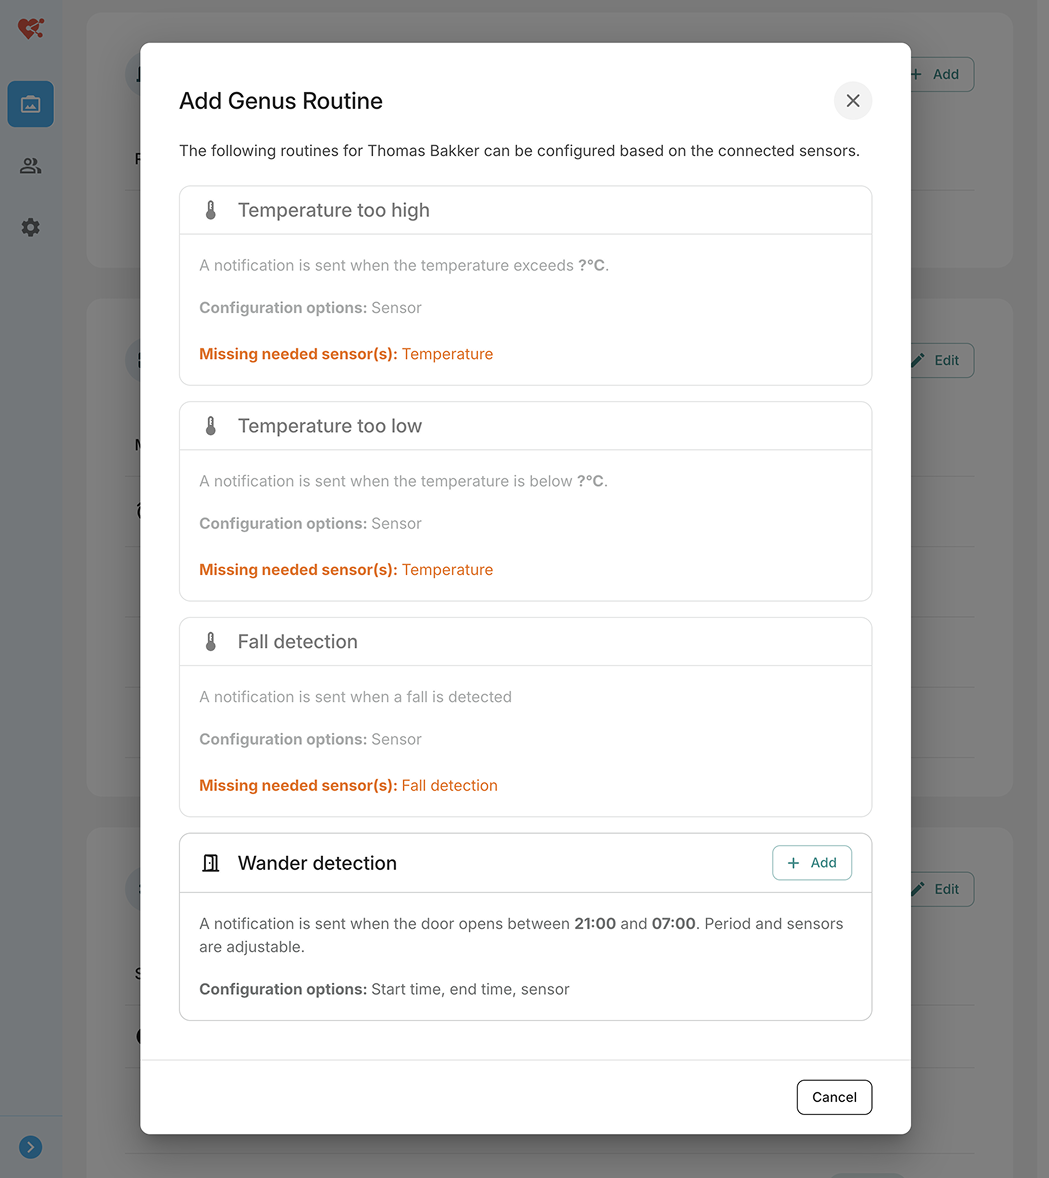
You'll see a list of Routines that are available. In this case the user only has a contact sensor (door sensor) configured so you'll only be able to set up Routines that require a contact sensor.
Click the "Add" button for the Routine you want to configure.
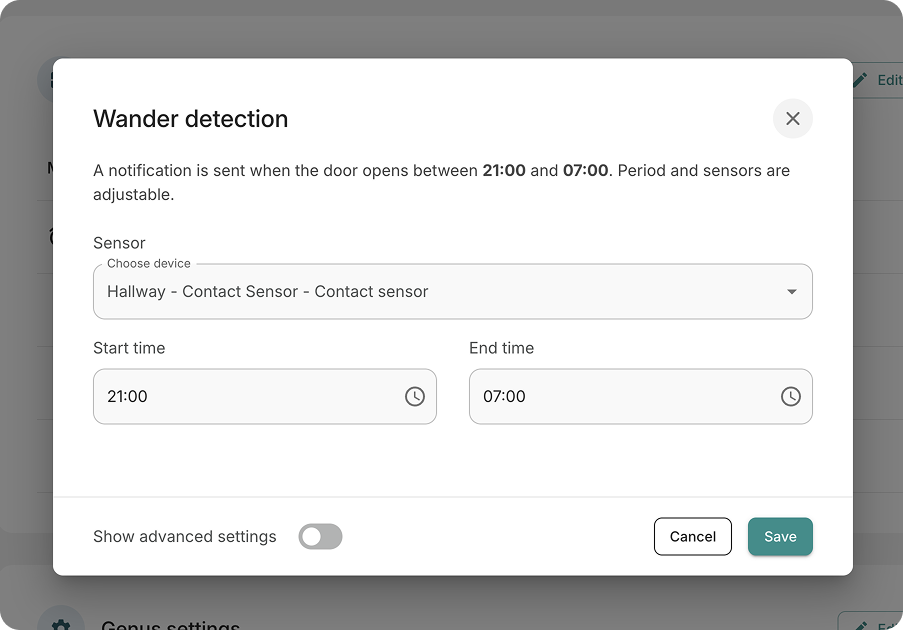
You can configure the Routine to your liking
Click "Save" when you're done.
The Routine will now be shown in the list of configured Routines.
You can always edit your Routine by clicking it.
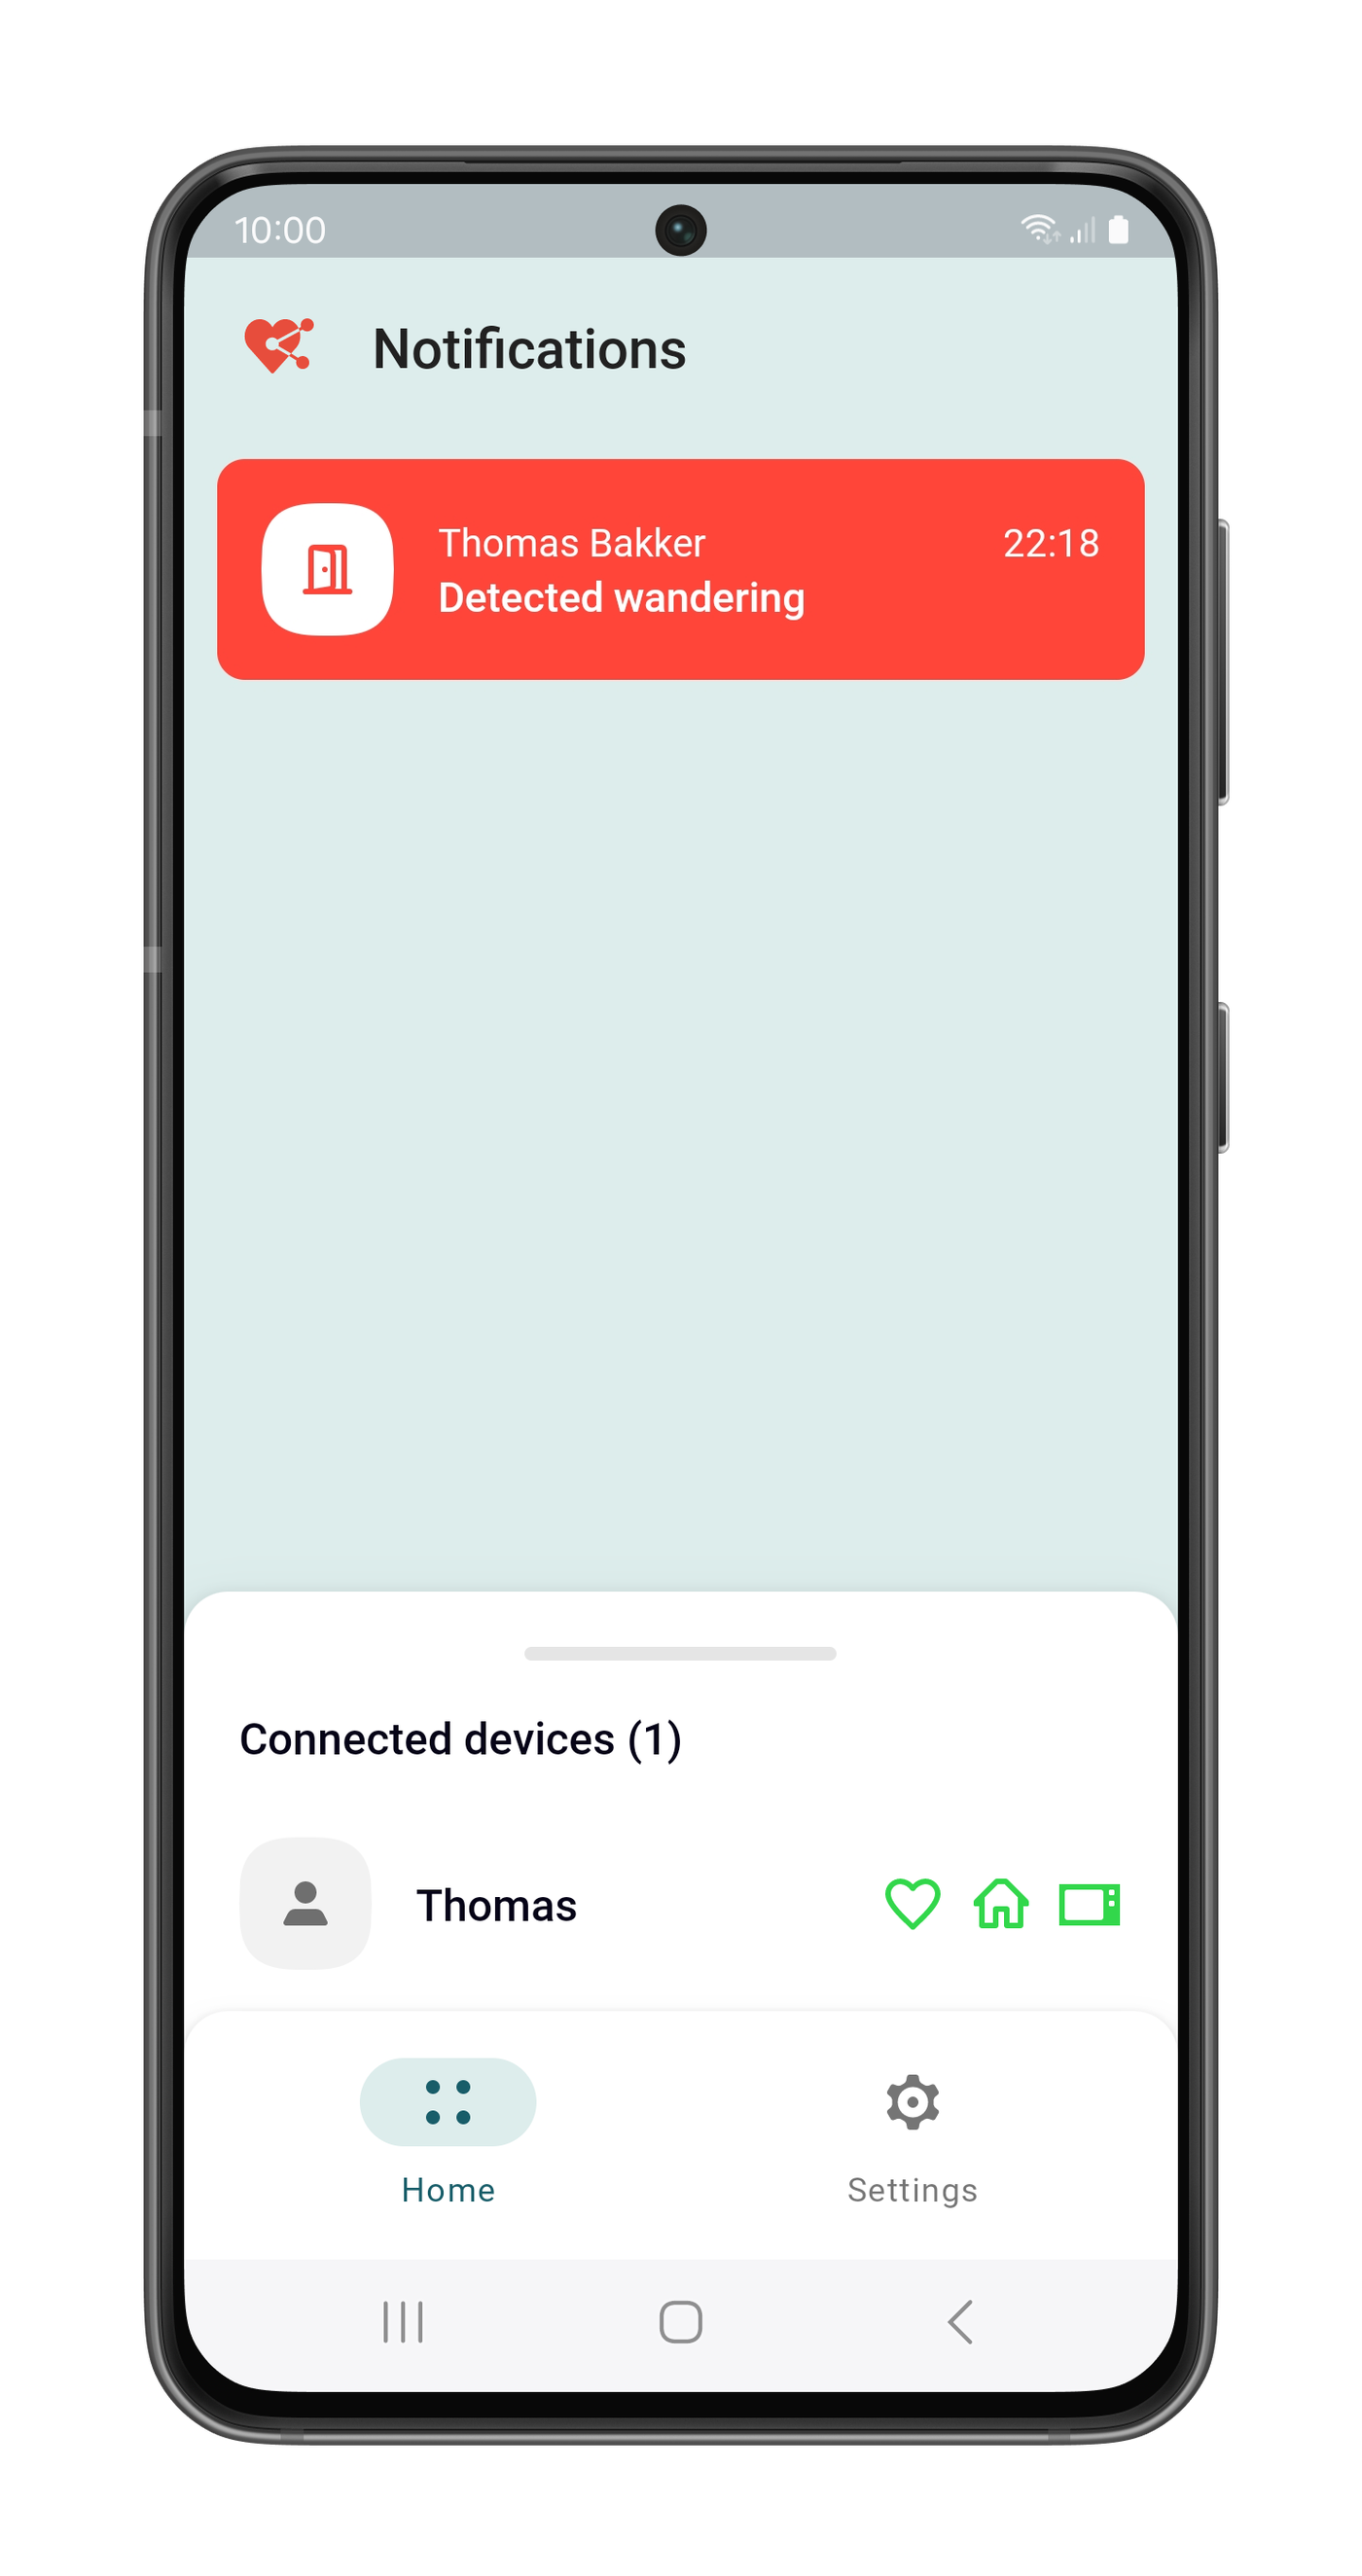
When the Routine is triggered it'll send a message or alarm to the Genus.
Generating a report
It's possible to generate reports for your user to generate an overview of room visits and triggered routines.
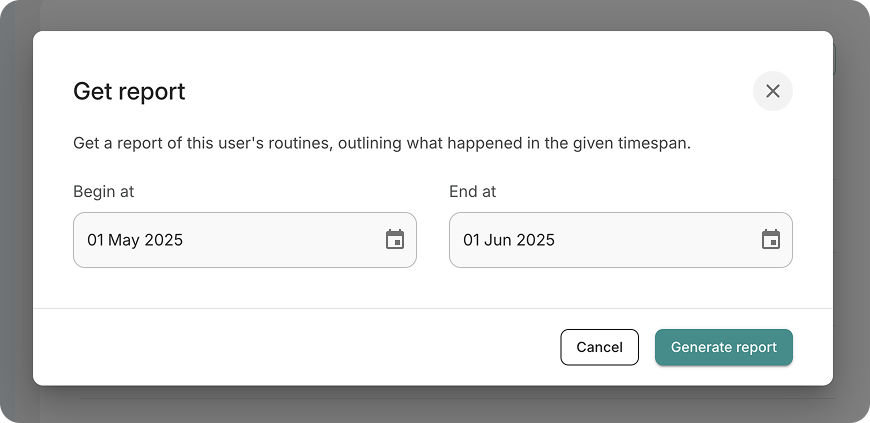
Go to the "Genus Routines" card in the user detail and click "Add Report".
Specify a start- and enddate you want to generate the report for.
Click "Generate Report".
Your browser will now download a PDF. Locate the file in your Downloads folder.
It's now possible to send messages to the Genus from the Android & iOS apps.
To send a message go to a user and tap the "Send message" button next to the "Video call" button. Once the Genus user answers the message, you'll get a notification and see the answer on the home screen.
Other updates regarding the phone apps:
The design of the iOS app has been improved to align better with the Android app and implement the new Genus corporate identity.
Fixed a bug where you'd see a "Could not load notifications" message on the bottom of the screen.
Text in buttons on Android should scale better on phones with larger texts enabled.
You can download the original marketing pictures in the attachments below